Installation guide for LED-strips with aluminum profiles - Step by Step | Beslag Design
Login / Retailer
Forgot password?
Installation and mounting of aluminum profiles with LED-strips

Tips and guides

 / 2023-12-04

Installation and mounting of aluminum profiles with LED-strips

Create the perfect lighting solution with our installation guide for aluminum profiles and LED strips. This guide will help you achieve even and aesthetically pleasing lighting for homes, shops, offices, restaurants, and hotels.

 
Step-by-Step

Installation Guide for Aluminum Profiles with LED Strips


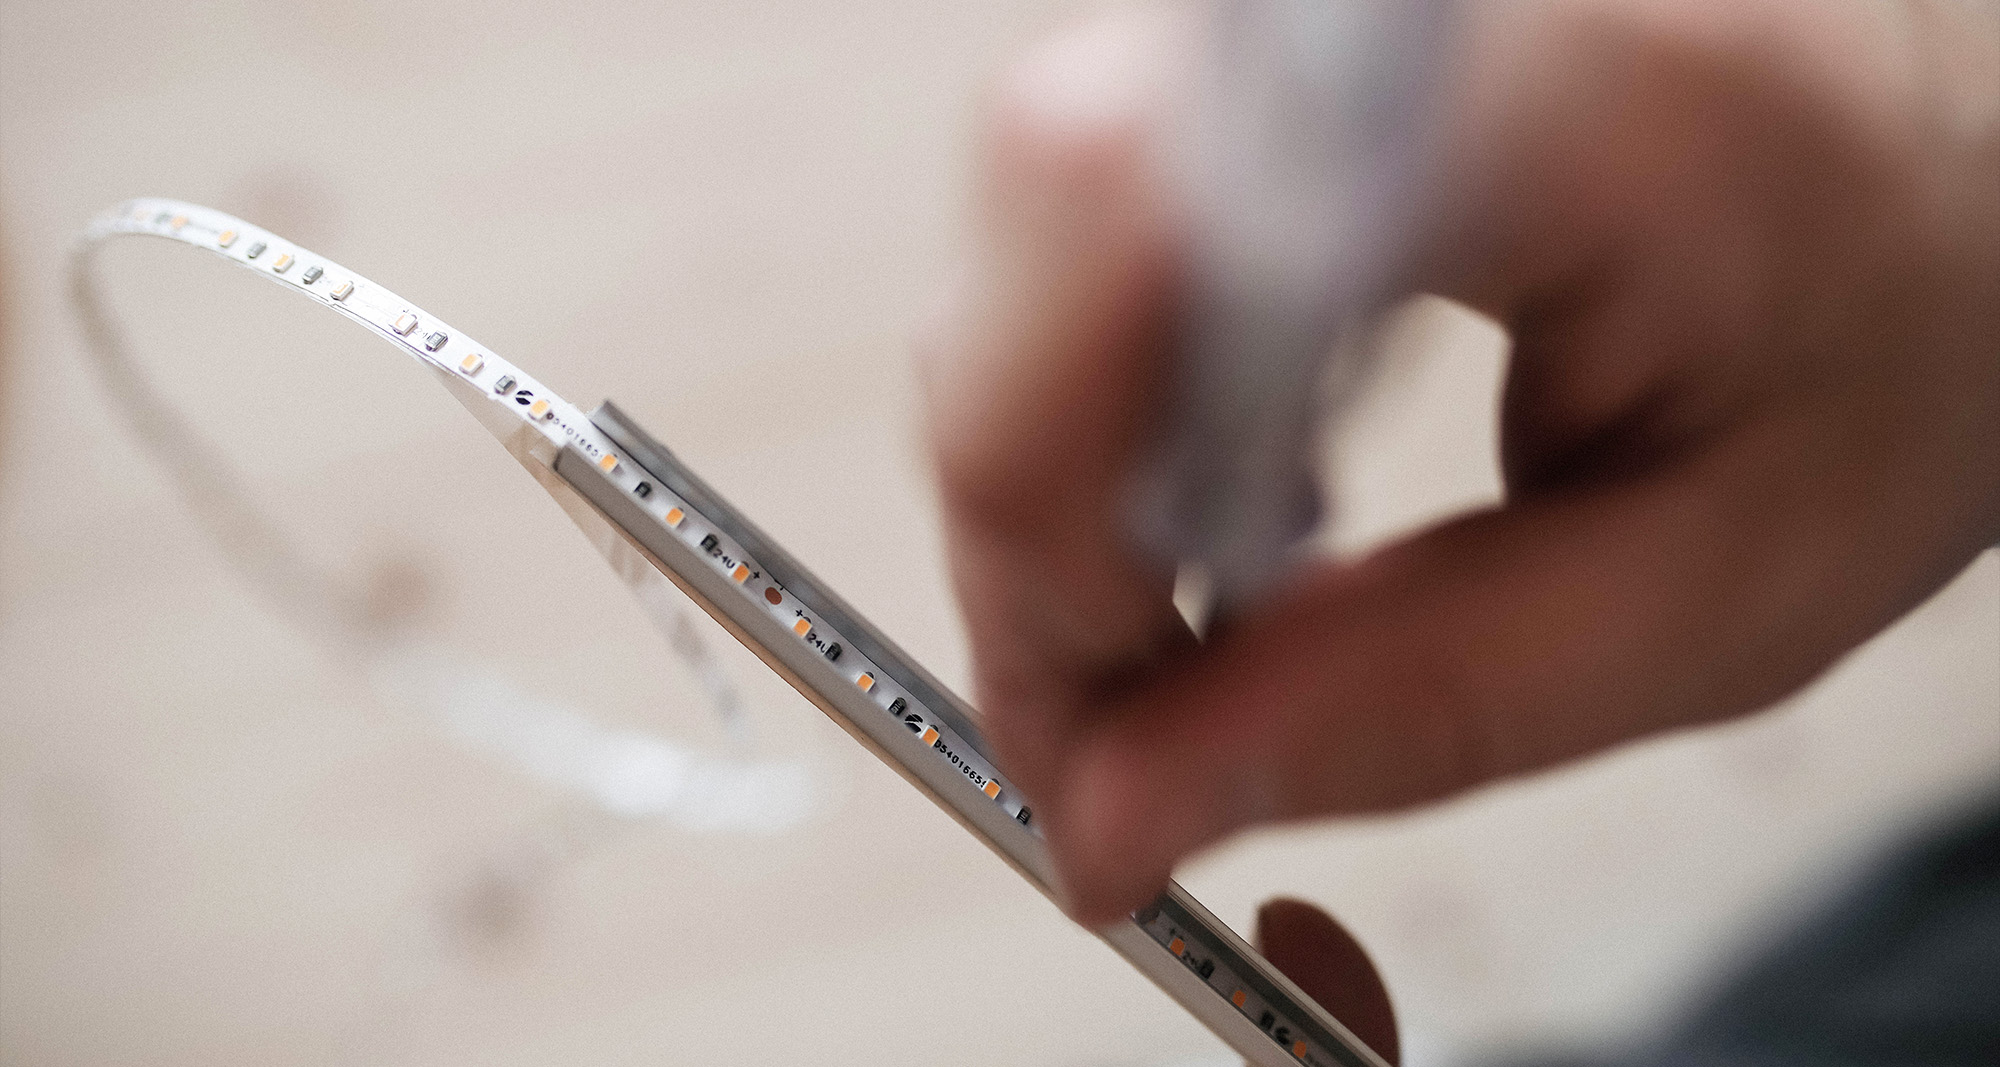
1. SELECT LED STRIP OR LED PROFILE

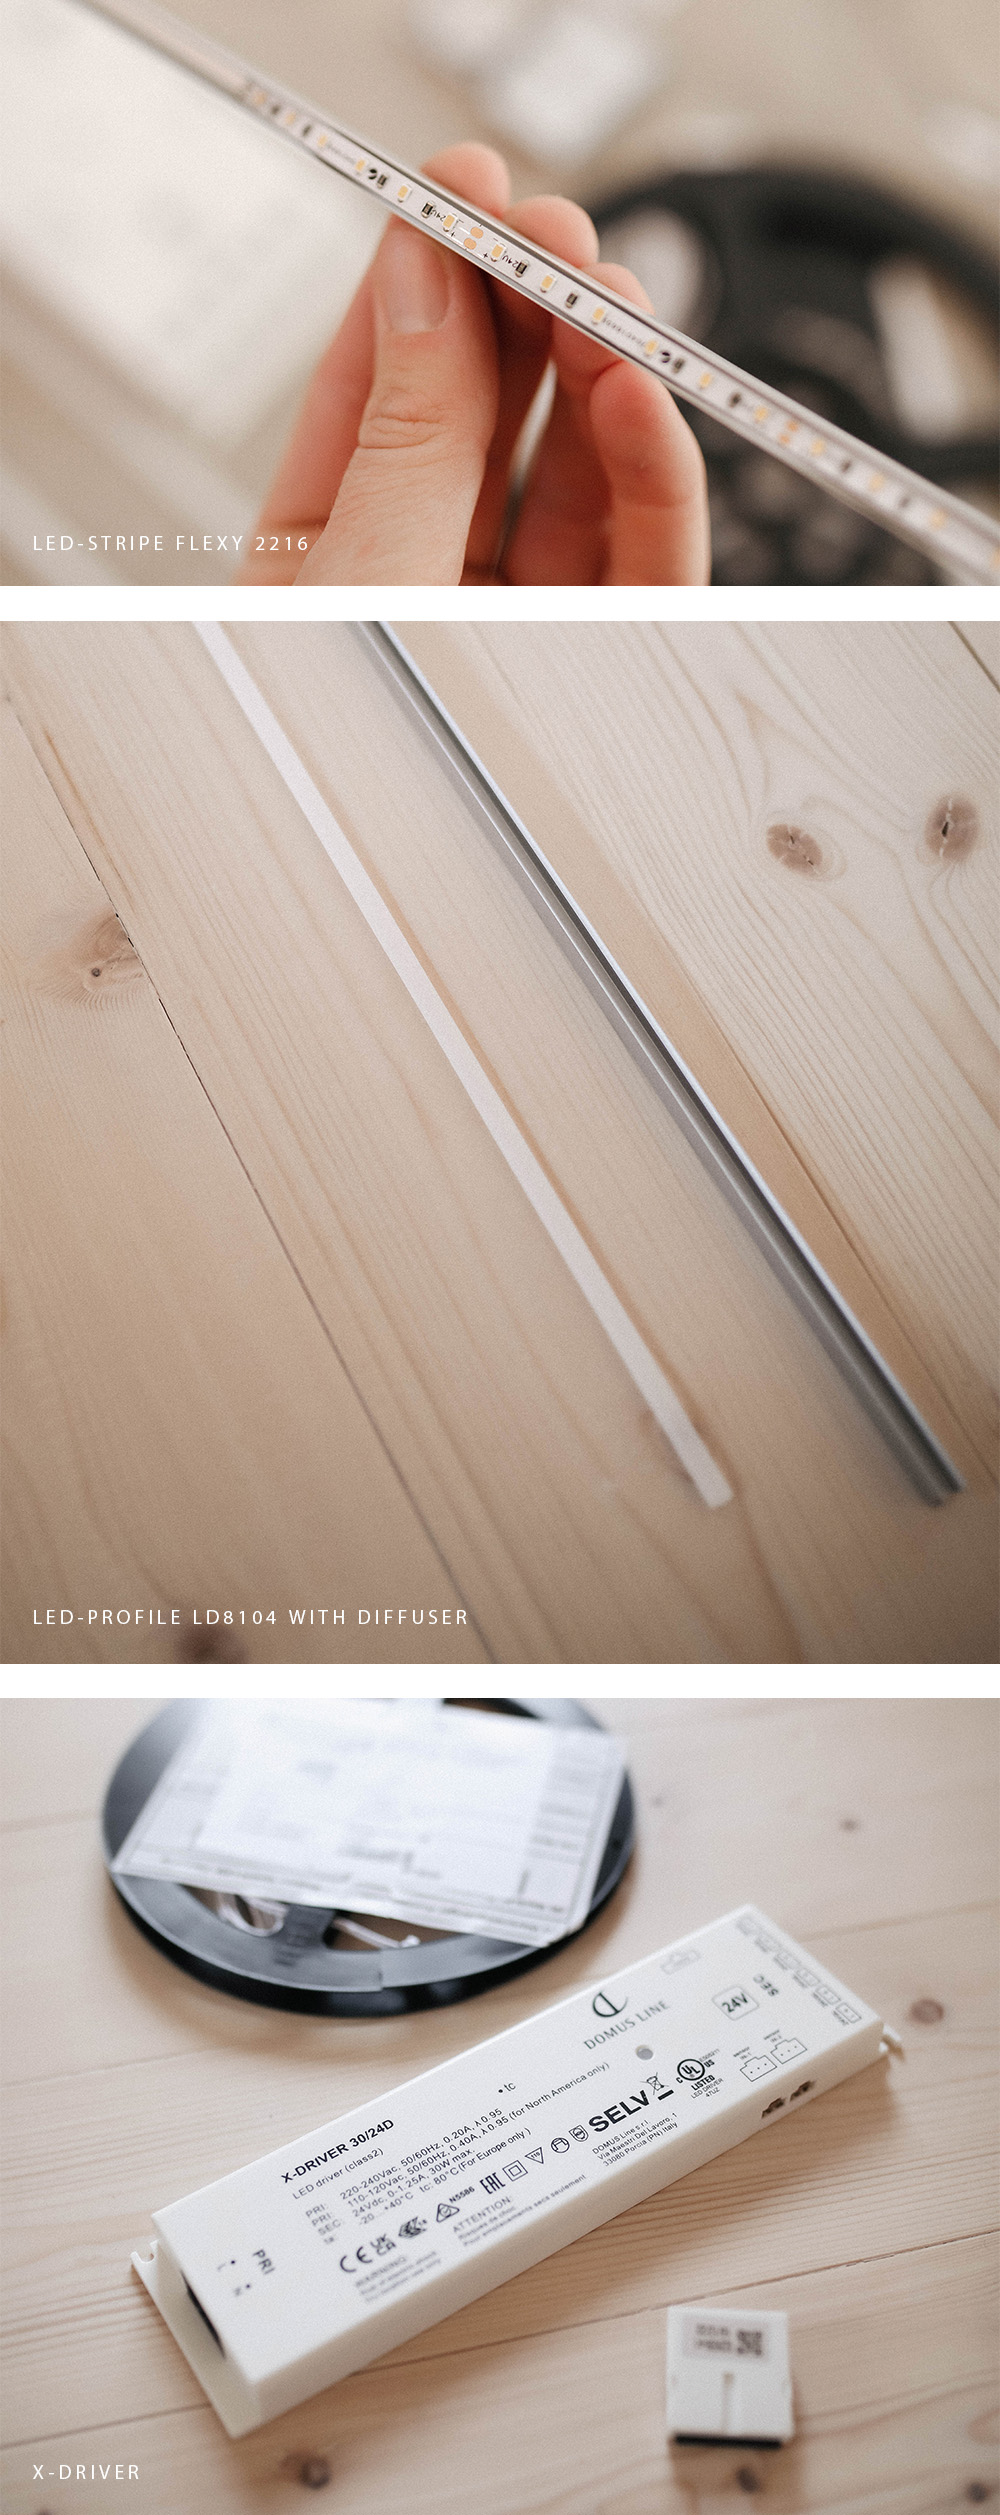
Start by choosing the LED strip or LED profile that best suits your project. Beslag Design offers a wide range of options, including strips with double-sided tape, different brightness levels, diode densities, and energy efficiency.


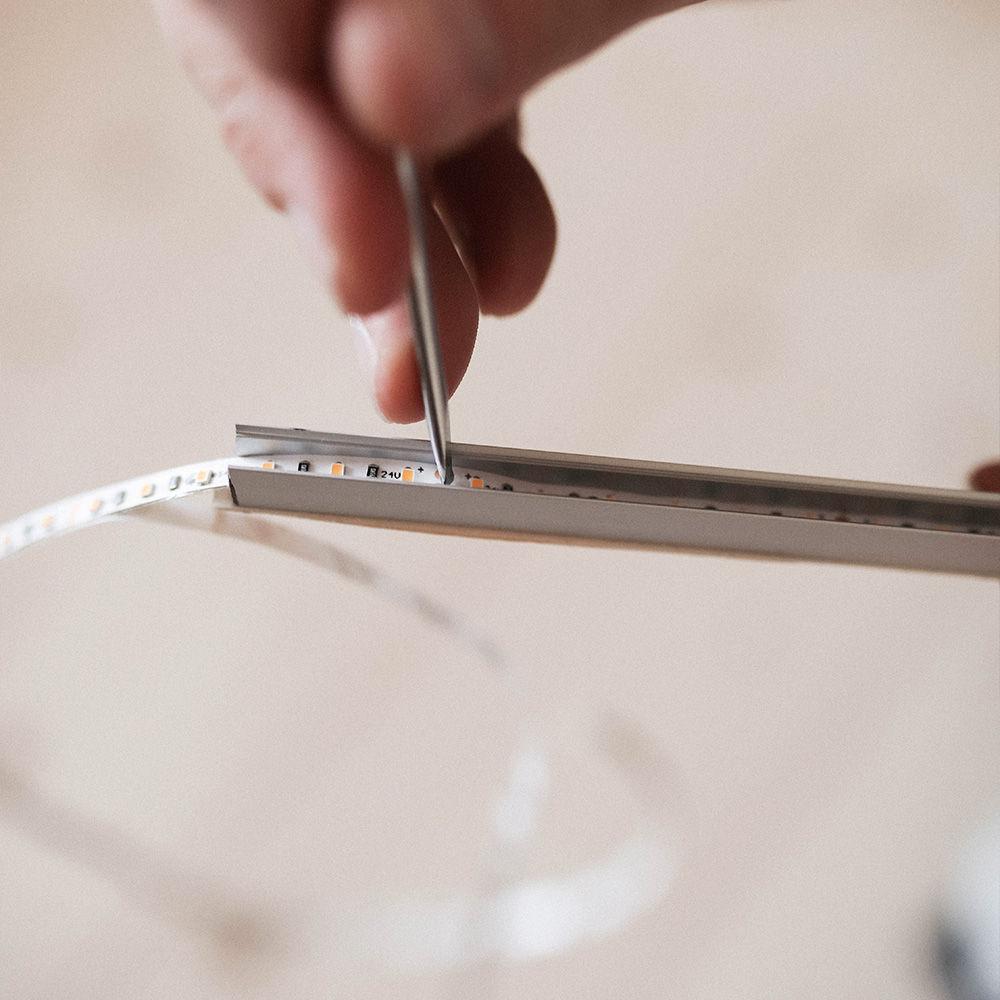
To ensure both protection and even light distribution for your LED strip, it's common to mount it in a suitable aluminum profile. Beslag Design has a wide range of LED profiles and accessories for various mounting needs. Before making your choice, it's important to understand the difference between surface-mounted and recessed LED profiles, as well as the difference between through-hole and blind-hole profiles – we explain these differences here.


2. CHOOSE LIGHT CONTROL AND DIMMER

How do you want to control your lighting? Give this some thought and consider whether you prefer the light to be controlled, for example, towards a door or cabinet door that opens/closes or through motion sensors. Add a sensor to enable automatic on/off, either through touch or motion. Customize your lighting by selecting a dimmer or a smart dimmer that allows you to control brightness via an app on your mobile phone.


3. SELECT THE APPROPRIATE POWER SUPPLY

To power your lighting, you'll need a power supply. Choose a driver that matches the total wattage of the lighting you've chosen.

Your choice of light control in step two directly affects your choice of power supply. The most common and flexible solution is to select a dimmable power supply that works with wall dimmers. Our dimmable driver Triac are compatible with almost all smart systems, including popular options like Plejd.

If you're using any of our touch dimmers or motion sensors, we recommend our driver UltraThin. If you prefer to control the light with voice commands, a remote control, or your mobile phone, we also have driver that enable that.


4. ACCESSORIES

Don't forget any accessories that may be necessary for your installation, such as connection cables.


Mounting Process


1. MEASURE AND MARK

Start by measuring the desired length for your lighting and mark it clearly on the underside of the aluminum profile. Place the mark so that it won't be visible when the lighting is installed.


2. PRECISE CUTTING

Use appropriate tools, such as a hacksaw, to accurately cut the aluminum profile and the diffuser according to your marks. Also, cut the LED strip and be careful to cut only at the specific marks to avoid extinguishing diodes without connections.


3. PROFILE MOUNTING

The process of joining and mounting the aluminum profile may vary depending on the type of LED profile you've chosen. Follow the specific installation instructions for the chosen profile to ensure a correct installation. See our step-by-step guide for the LED profile Apex.


Considerations When Choosing an Aluminum Profile

It's important to understand the difference between surface-mounted and recessed LED profiles, as well as the difference between through-hole and blind-hole profiles – we explain these differences below.


SURFACE-MOUNTED LED PROFILES

These profiles are mounted directly on the surface without requiring any grooves. They can be attached with included 3M tape, screws, or smart clips, depending on the chosen LED profile. Some examples of our surface-mounted profiles are LD8104, Twig XA, and Blade.


RECESSED LED PROFILES

These profiles are intended for installation in specially routed grooves on the chosen surface. The advantage of recessed profiles is that they seamlessly blend into the material they are mounted on. Most recessed profiles have an easy click-mounting feature that allows them to be placed in the groove without the need for screws or adhesive. Examples of our recessed profiles include LD8104, Apex and Miss.
 

THROUGH-HOLE GROOVES

These grooves extend from one side of the material to the other without interruption. Through-hole grooves do not require end caps to finish the profile's rounded ends, which often occurs when using blind-hole grooves.


BLIND-HOLE GROOVES

Blind-hole grooves do not extend across the entire material but can start and finish at desired positions. For example, 50 mm from the bottom and 50 mm from the top of a cabinet. When using blind-hole grooves, it may be appropriate to use end caps to create a neat finish on the profile and conceal the rounded ends of the routed groove.

To ensure accurate routing of the grooves, we recommend using a router or similar tool to achieve a precise and tidy groove. This step is especially important to ensure that the profile is securely and neatly attached.


STRAIGHT OR ANGLED PROFILE

When choosing an aluminum profile, it's also important to consider how you want the light to be directed. If you want the light to be directed towards a specific area, such as a kitchen cabinet or clothing in the wardrobe, we recommend choosing an angled LED profile. Examples of angled profiles include Blade and 8112. If, on the other hand, you prefer a straight light source, there are several options to choose from, such as Apex and Miss.
 

Dela inlägget

Read more

 Match your kitchen decor with the Aveny kitchen rail in untreated oak

Match your kitchen decor with the Aveny kitchen rail in untreated oak

With great enthusiasm, we introduce the latest addition to our family of kitchen rails – Aveny in untreated oak. This new design opens up a world of possibilities to customize the kitchen rail exactly to your preferences, creating a cohesive look that blends seamlessly with your kitchen design. The Aveny kitchen rail in untreated oak is more than just a functional storage solution – it's a detail that elevates the decor.
Explore the inspiring new arrivals of spring

Explore the inspiring new arrivals of spring

The news of spring have finally arrived, and we are proud to present a range that is both broad and inspiring. From elegant and discreet details and long practical handles, to more robust ones with an industrial, tough attitude – we have something for every taste and need.